Thursday, December 31, 2015

Last Post of 2015

I finished assembling all six quilt tops this week.  Guess I know how I'll be starting out 2016 - quilting!


Cheers!  And Happy New Year!

Tuesday, December 29, 2015

Tasting Table Tuesday - New Quilts for a New Year

I am spending a quiet afternoon at my sewing machine today, as we prepare for a bought of winter weather - finally!  Our family was here for a late Christmas celebration over the weekend and they left this morning.  Now the house seems strangely quiet.  A good day to get some sewing done while I remember how wonderful the last few days have been.  There is something magical about having young children here for the holidays - or anytime, for that matter!

As I look forward to 2016, I plan to make some changes to my Etsy Shop, and focus on making more of what I love - small quilts.  So this is my start at making some new, fresh, quilts.  I started these blocks at a quilting retreat this fall, and just finished the last of them now.
Enough to make six baby quilts.

Each quilt pairs White Kona Cotton with a Color in a checkerboard fashion.

There's a Coral & Gray one...

and a Green one... 

a Purple one... 

and an Aqua one... 

a Blue one... 

and the last is a mix of them all. 

All will be listed in my Etsy Shop, Cotton Cellar as soon as they're done.

Here's hoping that you all have a Joyous New Year!
Cheers!


Tuesday, November 24, 2015

A Kaffe Fassett Quilt for Dad

I am pretty confident that my dad doesn't read my blog, so I hope I'm safe in sharing this with you, because it's his Christmas gift.  Shhhh!  Don't tell!

I don't often use patterns for my quilts, but when I saw this one, I knew it was just what I was looking for.  I wanted to make a quilt for dad that was colorful, yet masculine.  This is it.


I really liked the modern simplicity of the design, and that blue Kaffe Fasset Roman Glass fabric was just perfect.  It is getting hard to find, but I tracked some down at Hancocks of Paducah and promptly ordered it.

I didn't want to pair it with white, so I found this gorgeous silvery gray fabric at my LQS.  It is from the Moodshadow collection from Andover.

I was already planning on quilting this with gentle wavy lines from side to side across the width of the quilt, and the lines in the gray print gave me something to follow.  So easy!
I stitched-in-the-ditch at each seam, and quilted straight lines across the blue bands.


The backing fabric is a simple cream and tan mottled wide-back, and I used more of the gray for the binding.

Now it's time to start preparing for Thanksgiving and a Grandkids Play Day here on Friday!  Woo Hoo!!!

Happy Thanksgiving to everyone.

Cheers!


Tuesday, November 17, 2015

Tasting Table Tuesday - Two Finished Quilts and a Challenge

The two memorial quilts are finished.

Labeled and bound and ready for delivery.

It was an honor to work on these special quilts, and I'm sure the recipients will find great comfort when they snuggle up in them.


Coming up next is a quilt I made for a challenge at my LQS.

Tracy, at Needles, challenged her customers to make a project featuring this fabric from the Luna Lounge collection from Andover.


Here is a portion of my quilt.

The challenge fabric appeared to be all neutrals, but when I paired it with a soft green and lavender, it seemed to take on those green and lavender hues - almost a chameleon effect.

My design consists of Ohio Star blocks, curved piecing in the sashing, and hourglass-in-a-square cornerstones.

I quilted it with soft, flowing curved lines from side to side, like waves.

This quilt, along with the other entries, are on display at Needles Quilt Shop in Wellsboro PA.

Cheers!

Sunday, November 1, 2015

A New Modern Quilt

I finished a quilt this weekend.

This is an idea that has been rattling around in my head for months.  What would happen if I stacked four fabrics, then rough cut them into a free-form churn dash block?

No pattern - no measuring - just cut them by eye.

Mix them up and sew them back together.

What would it look like?


I squared up each block, adding a little more "wonkiness" to each block, then sewed the four blocks together to make this nice little wall hanging.

I just love the freestyle look it gives to this traditional block.

I quilted each block with a slight curved line to start, then echoed it all the way to the edge.  Then went back and added matchstick quilting to just the first arc in each block, emphasizing the pinwheel effect in the center.


I also deviated from my normal binding on this quilt, and decided to try a facing instead.  I followed this tutorial from Terry Aske Quilts and found it very easy to follow.


I am very happy with how it turned out, and actually prefer this type of edge for a wall quilt.  Now I have lots of ideas for more quilts like this!

Edit:  I'm having a hard time photographing this quilt.  The colors just aren't true and I'm not having much luck with edits.  I just tried another angle in another location and it's a little closer to the actual colors, which are softer and more muted than the first three pictures.  I wish I was a better photographer...


Cheers!


Tuesday, October 13, 2015

Tasting Table Tuesday - Flying Geese & Quilt Show Results

I finished quilting the first of two quilts yesterday.  I don't want to reveal too much, because I'm sure the recipients are watching my progress, and I want to leave a little bit of a surprise for them when it's done.

Now I just have to finish piecing the second top, quilt it, then bind them both.  These geese will be flying south before too long...


***Quilt Show Update***

And on another note, a while ago, I mentioned that I had entered three quilts into the Modern Quilt Show at the Gmeiner Arts & Cultural Center in Wellsboro PA during the month of September.  I was shocked and thrilled to find that one of my quilts was awarded a First Place Viewer's Choice ribbon!

Thank you to those of you who attended this show, and voted, regardless of whose quilt you voted for.  It was an awesome show, and it was the first of it's kind at the Gmeiner.  We are all looking forward to many more shows like this in the future!

Here are the three quilts that I submitted to the show...

"Modern Churn Dash"


 "Shadows"


"Sunrise"


and the winning quilt is... "Shadows"

All three quilts are for sale and I plan on listing them in my Etsy Shop soon, as time allows.
Inquiries are welcome!

Cheers!

Tuesday, October 6, 2015

Tasting Table Tuesday - Tips for Making Quilts from Shirts

Have you ever made a quilt using flannel shirts?

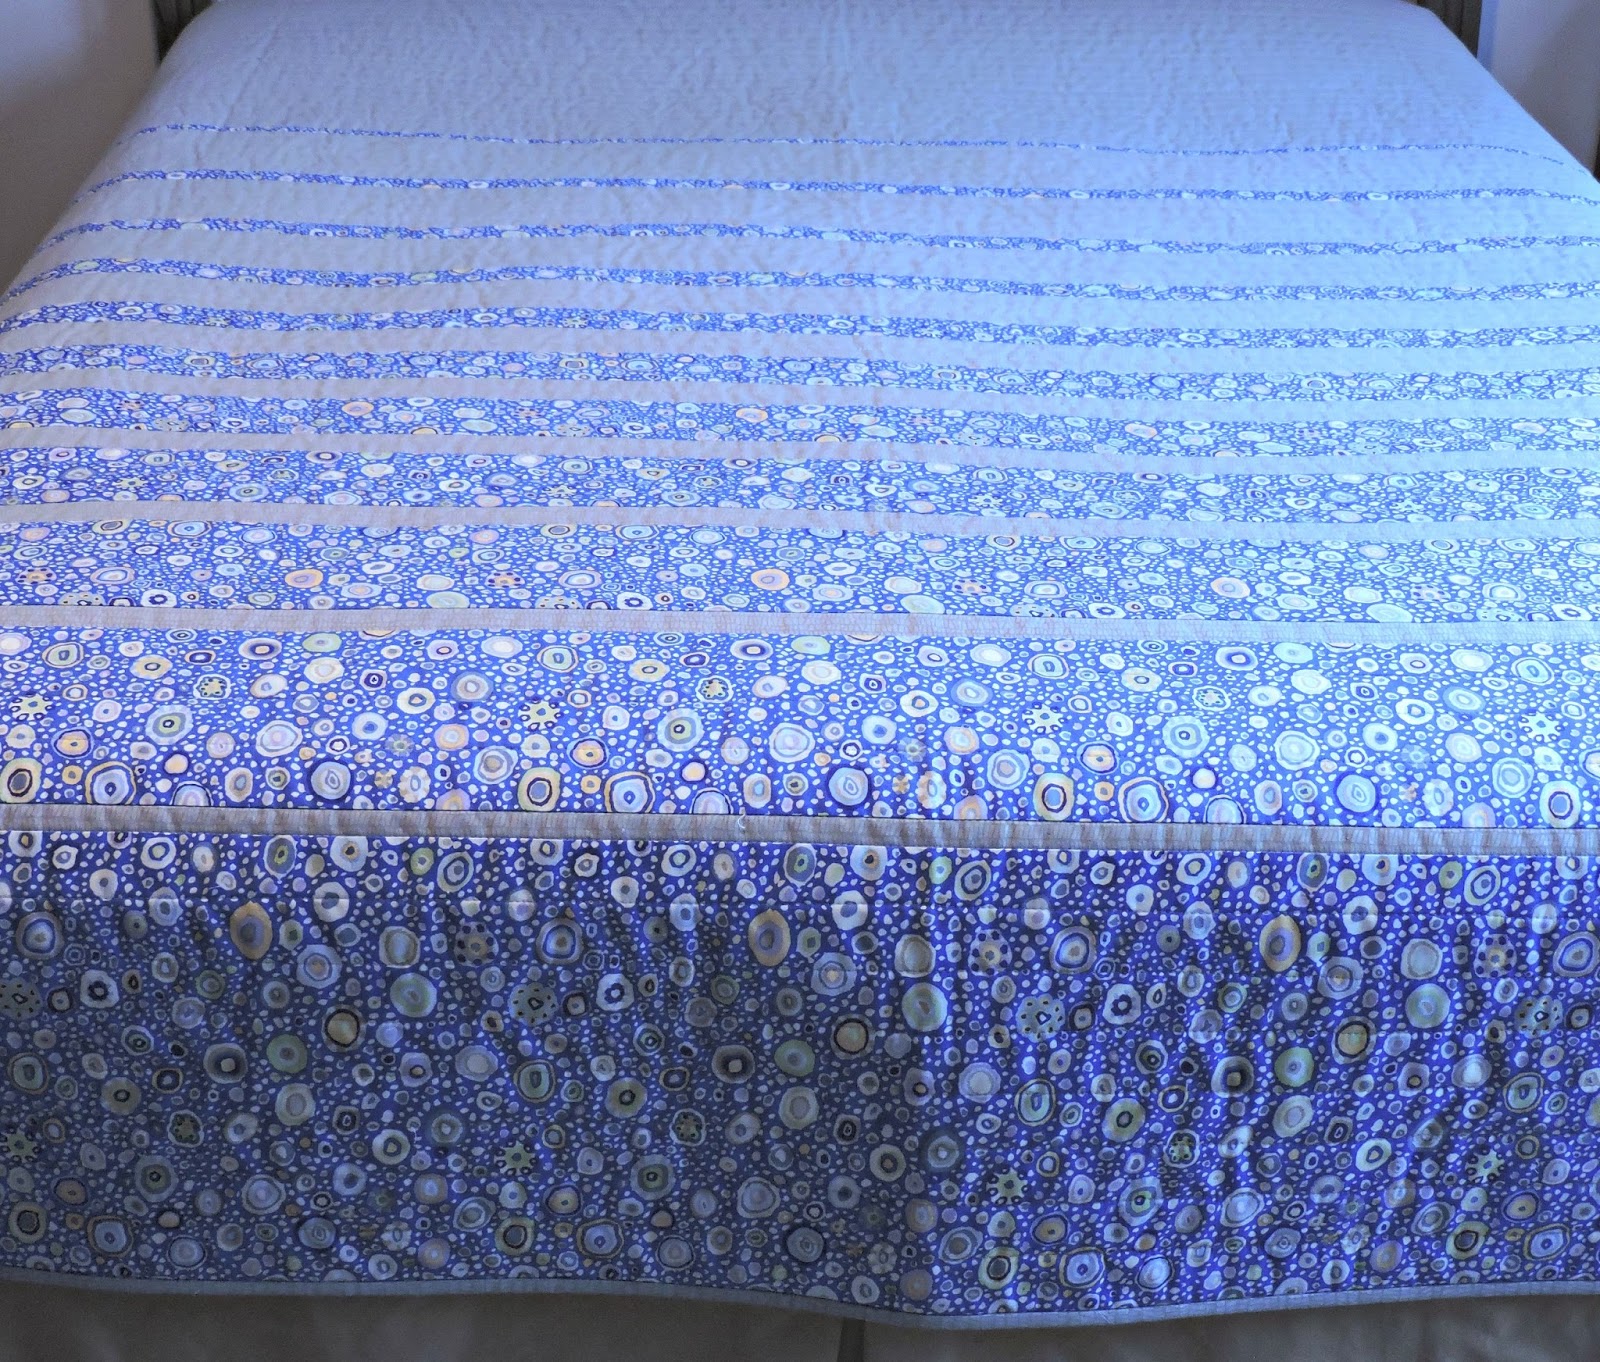
I have made several quilts from oxford cloth shirts (cotton), but this is my first experience using other fabrics, like flannel.  The shirts I was given are a mix of fibers, including heavy chamois-weight flannel, medium weight flannel, and lightweight acrylic/polyester.  For someone who has always used cottons, this is quite a diverse range of fibers, and they create their own set of challenges, requiring a totally different approach.

So I thought I would share what I've learned, for those of you who might want to try making a quilt from these types of fabrics.

The lightweight acrylics proved to be the most difficult.  They are very fluid, loosely woven, fray very easily, and don't play well with the others.

So I resorted to some tools to help them behave.


The first is spray starch.  It makes a huge difference in the amount of control you have over your fabric.  It took two cans to starch all of the shirts, but it made the cutting so much easier.  (Tip - spray one side of the fabric, then flip it over and press on the other side to avoid flaking.)

But the bias edges of the triangles were still very stretchy and hard to control.  So I used Sharon Schamber's method of basting each seam with Elmer's School Glue, then pressed to dry the glue, and that really helped to stabilize those bias edges and reduce the fraying.  (The acrylics fray like crazy!)

Click here for a video by Sharon's daughter, Christy, demonstrating the basting technique and the special tip for the glue bottle.  (If you use the tip that comes with the glue bottle you'll get way too much glue.  You only need a hair-line to do the job.)

Once all the Flying Geese blocks were finished, it was time to start pairing them up... glue-basting and pressing every seam.


Once they were all glued, I chain-pieced them into pairs.  No pins!  Yay!  That glue works like a charm!


Since many of the fabrics were very heavy-weight flannel, the next hurdle was the bulk in the seam allowances.  My solution was to clip two notches out of the seam allowance at the tip of each goose, allowing the seam allowance to go one way in the center, and the other way at the sides, minimizing the bulk in the side seams when I sew all the rows together.


Of course, all this clipping makes for lots of Quilter's Confetti!!!


It is definitely a lot more work to starch, glue, press, clip, etc...  but the end result is so much neater and precise than I could have ever accomplished without these extra steps.

And when it comes to a job like this, precision is not an option.

These Geese will be flying in perfect formation soon.

I hope these tips help, for anyone contemplating making a quilt like this.  I love to share with other quilters, so please feel free to ask questions if you'd like more information.

Cheers!