As a drafter, I prefer to use my computer to experiment with different quilting design layouts before I start stitching. My motto has always been "If I can draw it, I can quilt it".
Once I came up with a design I was happy with for this Shot Cotton Star quilt, I then had to figure out the most efficient way to quilt it, with the fewest stops and starts possible. That's what all the numbers and arrows are for - kind of a "road map" for quilting. If I follow this diagram without taking any wrong turns, I should be able to quilt all of the main arcs around the stars (traveling through the stars) in one continuous path. Of course, I'll have to break thread for each of the cross-hatched diamonds.
(I'm not sure about the piano key design around the outside edge yet - I'll figure that out after I get the inside quilted.)
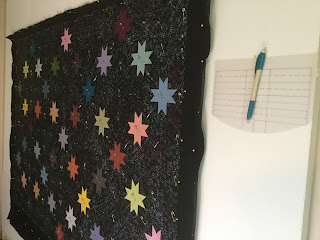
First, I pinned all three layers of my quilt sandwich to my styrofoam basting wall, then I marked the quilt top with a white ceramic mechanical pencil and a mylar template that I made for drawing the curves. If I had the correct size curved ruler, I would skip the marking and use my ruler foot on George, but I don't... so marking is the next best option (assuming I can stay on the lines when I'm stitching... we'll see how that goes...)
Once all the marking was done, I basted the three layers together with safety pins, and now it's ready to quilt! Check back next week and see how far I get with the quilting.


No comments:
Post a Comment
Comments from my readers make me smile!