Monday, October 21, 2019

Arthur Revealed

Wow!  Has it really been 8 months since my last blog post?  I have so much quilty news to share, but first I have to reveal my latest work in progress.

In 1969 Arthur Gmeiner gifted the Gmeiner Arts and Cultural Center to the town of Wellsboro PA and I am lucky enough to "work" there part-time as a docent.  In celebration of it's 50th birthday, I seized the opportunity to try a new quilting technique and started working on this mosaic quilt, based on a self-portrait that Arthur painted in 1972.  The top is now pieced and waiting for me to figure out how I want to quilt it...  


I learned so much from this project, and there are definitely things I would do differently next time, but that's what learning is all about.

One of the quilters whose work I admire (adore!) is Timna Tarr.  She has perfected this technique she calls Stitched Mosaic and has just completed a series of 12 barnyard animal quilts that is just amazing.  Click here to see them all.  I saw her do a demo of this technique on The Quilt Show and couldn't wait to give it a try.  This seemed like a good opportunity, so here's my first attempt.

I started with a poster size enlargement of a picture I took of Arthur's painting, then overlaid a clear vinyl 2" diagonal grid, and proceeded to build the quilt, one 2" square at a time.  Here is a pic of the photo and overlay pinned to my design board.


The hardest part for me was deciding which fabrics to use where.  You approach each square separately and hope and pray that they will all blend well when they're sewn together at the end.  This pic shows part of the quilt assembled.


I added Arthur's initials to his pocket hankie...


... and I thought it was interesting that his eyes seem to follow me, whether I took the picture from the left or the right.


And here's a couple of close-ups.  I'm not totally happy with how his facial features turned out, but from a distance it's ok.  And it's not quilted yet, so that will change the final appearance too.


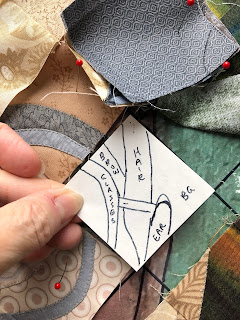
The next three pictures show the process of creating a single 2" square.


I'm already looking forward to trying another one in the future so I can improve on what I learned this time.

Once I finish quilting this I'll share final pictures and also try to get caught up telling you about all the other exciting quilting news from the last 8 months!  There's alot to share!

Friday, February 22, 2019

OBW #2 Finished

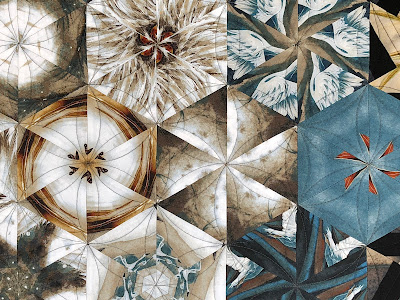
OBW #2, now known as "Whoo's Hiding?" is complete.  I'm really happy with my quilting choices on this one.  I emphasized the central hexagon ring with straight lines in charcoal thread, then quilted continuous curves on the rest of the hexagons with lighter neutral thread, and finished off with piano keys in the ombre/bird borders.  The owl is the only bird in the original fabric panel that didn't make it, intact, into the quilt borders, but I used the entire panel for the hexagon portion, so the owls are in there.  Can you find them?


Saturday, October 6, 2018

One-Block Wonder #2 - Top is Pieced

I finished assembling the quilt top of OBW #2 today.


My original plan for the border was just to use the ombre all the way around, but I really wanted the light part to be in the middle of each border and the dark in the corners.  The fabric gradation wouldn't allow that, so I had to "stretch" the ombre to get the effect I wanted, so I used four of the remaining bird panels from the original fabric that I used for the center of the quilt, and inserted one into the middle of each border.


But I still needed to "stretch" the dark ends of the ombre into the corners.  I finally had a brain-storm and decided to try making ombre nine-patch corner blocks and it worked perfectly!


The fabric has a very subtle linear design in it, so I alternated the direction of the lines, horizontal and vertical, so the nine-patch effect shows up, but it's very subtle, almost looking like the corners are woven.  It's exactly the look I was going for. (Ignore those little yellow dots - I pinned the quilt to my design wall to take these pics.)

Once I finish quilting it, I will bind it with solid black, matching the narrow inner border.

I decided to share the pieced quilt top with you now, because it will likely be a few months before I'm able to start quilting it.  But when I do, I'll posts more pics then.

In the meantime, I have two customer quilts to make, and a Quilty-Trip coming up.  I'm going to Quilting on the Bayfront in Erie PA next week!  Can't wait!  I'll tell you all about it in my next post.

Wednesday, September 26, 2018

One-Block Wonder #2

I haven't made any more progress on the quilt I shared on my last post (4 months ago - yikes!) but I had a very busy summer packed with friends, sewing, grandkids, retreats, etc. and I'm afraid that this blog fell by the wayside.
Anyway, I'm looking forward to sharing my current project with you now, still a work-in-progress.


Earlier this month, I presented a little talk/demo about One-Block Wonder Quilts at my local Quilt Guild's Semi-Annual Quilt Exhibit, and this is the quilt I started specifically for that demo.

The fabric I chose is a panel called North American Wildlife by Jody Bergsma for Robert Kaufman Fabrics.


I love all the colors in this panel, especially the pops of blue and white.


All the half-hexagons are sewn into vertical rows now and once I get all the rows sewn together I'll make a final decision on borders.  I have some fun ideas planned, but I won't commit or share until I have the center done, so check back soon.

In the meantime, here are some pictures I took while working on the blocks.  I've never had eyes in my quilt before, so this is a first!


Monday, May 28, 2018

Artisan Batiks & Grunge

I bought an Artisan Batik Charm Roll a couple of months ago, and found them to be a perfect match for a charm square pack of Grunge fabrics that I already had.  So, with no particular plan in mind, I sewed them all into blocks.


I have 4 of each of the 22 you see here, for a total of 88 blocks.  I have been playing with several layout options on EQ, but haven't made a final decision yet.

      • One large quilt, or two smaller ones...
      • With or without alternate blocks...
      • With or without sashing...
      • Straight set or on-point with setting triangles...
Hmmm...  decisions, decisions...

Wednesday, May 23, 2018

Urban Oasis Companion Quilt

Wow, it's been a busy month since I last posted about my Urban Oasis quilt.  I have since completed two T-Shirt quilts for a client, but can't share them yet because they are a surprise gift for the recipient.  Don't want to spoil the surprise!

Then I put some leftover pieces from my One-Block Wonder quilt, Urban Oasis to good use.  I had just enough scraps left over to make seven additional hexagon blocks, and once I made them, I realized how perfectly they went with this hand-dyed background fabric.


I picked up a bundle of these hand dyed fabrics in various colors at MQX in Manchester NH a few years ago, and had been saving them for just the right project.  This was the one!

I see a dark, stormy sky in this quilt, so I named it "Midnight Storm at the Oasis", since it was made as a companion quilt to the original One-Block Wonder quilt called "Urban Oasis".  It is a small wall quilt and I chose to use a facing instead of a binding.


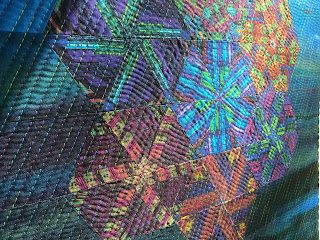
I mulled over several different quilting options (at least a dozen!) before I settled on this one.  And I'm so glad I did!  I love how the variegated King Tut thread (from Superior Threads) gives the illusion of rain over the entire quilt.  The lines are about 1/4" apart, and I stitched it on my Juki TL2010Q using a walking foot.

I am in love with the texture on this quilt!  This is the first time I've used King Tut thread, and I love the short color transition, compared to other variegated threads.  It changes color about every 1 1/2 inches or so.


So that's the end of my Oasis story.  I'm already moving forward on to more colorful quilts so stay tuned!

Sunday, April 8, 2018

Urban Oasis - OBW is Done!

It's finally finished!


I started this One-Block-Wonder nine months ago, but other projects kept taking priority, so it kept getting set aside.  (Click here to see my previous posts about this quilt.)

The quilting took a LONG time, but I am so happy with how it turned out.  I quilted the center spiral on my Juki TL-2010 using the walking foot and Glide thread in white.


Then I switched over to my APQS George sit-down longarm machine and quilted continuous curves in the remaining hexagons and straight-line piano keys in the border, using So Fine #50 thread in gray - all ruler work, so it took many many hours.  Now I wish I had kept track of my time...


After auditioning about a dozen different binding fabric options, I finally decided on this aqua ombre.  I love how it repeats the light aqua colors in the center of the quilt and adds an extra little zing.


I used Quilter's Dream Green batting in this quilt for the first time.  I LOVE LOVE this batting!  It quilts like butter, lays flat and smooth, has just the right amount of loft, and does not crease or shrink.

I've always used cotton batting, but disliked the crease left when the quilt had been folded for any length of time.  Bye Bye fold-lines!  I think this will become my new go-to batting in the future.

Of course, there will still be occasions to use cotton, but it's nice to have a choice, based on the project.  OH!  And the other great thing about this batting is that it's made from recycled plastic bottles!  I know, plastic doesn't sound appealing, but it really feels wonderful!  Trust me!


 Instead of using a piece of the original Skyline fabric on the back or a border, as many quilters do, I decided to print an image of the fabric panel on my quilt label instead.


I named this quilt Urban Oasis because the original busy city skyline fabric magically morphs into a tranquil gazing pool in the finished quilt.  It still amazes me that the entire center section of the quilt is created from just one fabric.  It's a "Wonder"alright!