Monday, March 31, 2014

Tasting Table Tuesday - Lots of Projects

My oh my...  So much to catch up on...

A few weeks ago (this post) I told you that Family Ties #3 was out to be quilted.  It came back from the quilter looking gorgeous, as expected.  Then I added the scrappy binding using even more of the neckties from my client, added the label and shipped it off to it's new home.  Family Ties #4 is next.  The last in the series.

And remember the Vintage Hankie Quilt I mentioned in that same post?  Well, that is now assembled and ready to go out for quilting as soon as I find the perfect backing fabric.  I painstakingly stitched each hankie to a background of Essex Linen in Natural, using a narrow zigzag stitch and matching Aurifil 50wt thread.


The thin Aurifil thread virtually disappears on most of the hankies.

If you remember, I was on a mission to find fabrics for the sashing from an old collection called Morning Glory by Robyn Pandolph.  I used these fabrics to make a quilt for my daughter several years ago and they are no longer available.

But I just knew it would be perfect for the scrappy sashing strips...

I spent hours searching the internet, then discovered that one of my good friends just happened to have some in her stash!  Oh Happy Day!  When I combined hers with mine, there was enough to do all the sashing as well as a scrappy binding!  Like she always says - "sometimes it's not what you know, it's who you know".  How true!


I added a 6" border of the Essex Linen to give the longarm quilter room to do some of her exquisite custom quilting.  The quilting alone is going to make this a show stopper - I guarantee!  Her work is amazing...  just wait and see...

This weekend I took some time out and worked on a "me" project.  Have you guessed what it is yet?


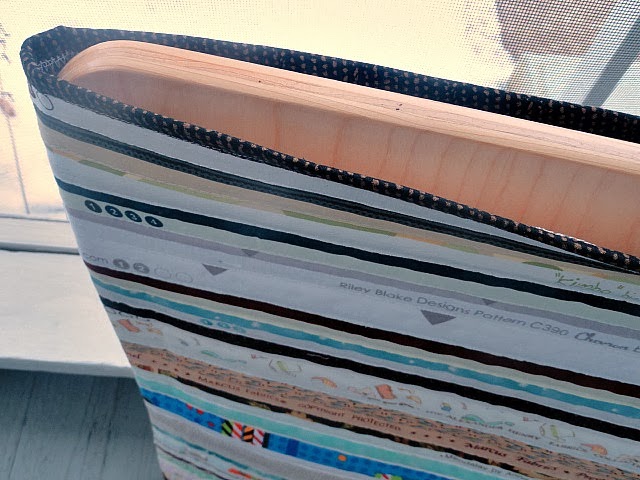
That's right!  A new purse - and it's mine!


It's the Two-Zip Hipster pattern by Dog Under My Desk.  I've made this bag a few times for customers, but never for myself.  You see, I'm going to the Machine Quilter's Exposition (MQX) in New Hampshire next week and wanted something easy to carry that would also hold my iPad.  This fits the bill perfectly!  And I've been in love with this gray IKEA fabric for ages and was just waiting for an excuse to make myself something with it.

The outer slip pocket will be perfect for stuffing brochures and papers that I pick up along the way, and the zippered one will hold all my little loose stuff.

I lined it with a pretty light aqua cotton, and it has slip pockets for my digital camera and phone.


And of course, every new bag has to have a matching wallet!


Did I mention that I'm going to MQX next week???  I'm so excited!  I was there five years ago and have wanted to return ever since.  I've signed up for several lectures, as well as a Judy Niemeyer Paper Piecing class taught by Jackie Kunkel of Canton Village Quiltworks.  I've followed Jackie's blog for quite some time and am in awe of the projects that she and her students accomplish.  When I discovered that she was teaching at MQX this year, I jumped at the chance to take one of her classes.  This is the block we're going to make.


Like I said before - I'm SO excited!!!

Cheers!

Sunday, March 23, 2014

A Love Affair

Remember this quilt?  From this previous post?
It's called Zig Zag Beach and it was selected as a winner in Gyleen Fitzgerald's Challenge to our local quilt guild.  I'm now thrilled to share her new book with you, and if you check out page 89, you'll see my quilt!
It's the first time any of my quilts have been published, so while it's not earth-shattering to the general public, it's a big deal for me and I just had to share it with you.

The other two quilts were made by two fellow members of our quilt guild, Betty Maxwell and Deb Dom, and I'm sure they are as excited as I am to see their quilts published as well.  Congratulations!

Gyleen's new book is called "Polygon Affair, So Easy You'll Fall in Love" Contemporary Quilt Designs for the Modern World.  If you haven't read it yet, you should.


This isn't your ordinary quilt book of just quilt patterns.  It is also filled with love stories.  The entire book is built on and around LOVE.  Stories and pictures of LOVE, quilts about LOVE...  Better than a romance novel, especially if you're a quilter.  And it's hard cover, to boot!  A great addition to any quilt lovers library.

All of the quilts in this book were made using Gyleen's Polygon tools and I'm amazed at all the different things you can make with these rulers.  And without the dreaded "Y" seam!  Learning Gyleen's Butterfly Seam technique is worth the price of the book in itself!

If you live in my local area, you can find the book at Needles Quilt Shop here in Wellsboro, or you can find it on Gyleen's website, Colourful Stitches.

Cheers!

Wednesday, March 19, 2014

My Bleeding Quilts

I finished four baby quilts last week.  Three of them are bright - VERY bright!


As usual, I washed these quilts.  Knowing that baby quilts are meant to be used and will be washed frequently, I like to wash them myself before they leave my hands.  That way, if anything unexpected happens, it happens to me - not my customer.

Good thing I did, because the dyes in these quilts bled like crazy!

I was so upset that I didn't even photograph the damage.
I was sure the quilts were destined for the garbage bin (or animal shelter as dog beds).

I put four Shout Color Catcher sheets in the washer and this is how they came out...
If you think that looks bad, you should have seen the yellow backing fabric on one of the quilts.  It was way worse than this - believe me!  It looked like a 2-year-old had a field day with markers and mommy's lipstick. I was sure it was ruined...

The green and blue backed quilts were affected also, but not nearly as bad as the yellow one.

Naturally, I blew off steam to a friend and whined about my problem.  She found an article on the internet about bleeding quilts, which she forwarded to me, with hopes it might solve the problem.
Thank the Lord - it worked!!!!!

I won't share all the details here, because you can read it all for yourself HERE.  If you have ever had this problem with any of your quilts, or just want to be prepared for the possibility, you HAVE TO READ THIS BLOG POST!


A huge thank you to Vicki Welsh for her research and testing.  Every bit of excess dye came out of my quilts and they are like new again!  (And thanks to my friend Ann, for finding the article for me!)

Cheers!


Sunday, March 9, 2014

Chalkboard Fabric Placemats for Kids

By now, you've probably seen this chalkboard fabric popping up in all the fabric shops.  After letting my grandkids draw on a piece that I taped down to my desk over the holidays...(click here for that post) I realized just how much they enjoyed this stuff.  So I decided to make them each a special placemat.


First, I machine stitched the outline of a place setting on the chalkboard fabric using white thread, and this stuff stitches like a dream!  I had no problems at all.  And they have the added bonus of helping the kids learn how to set the table!

Then I made a patchwork backing using some charm squares in my stash, then quilted it to a piece of cotton batting.  Bright colors for Grayson...
 And lots of pink for Rory.
Then I basted the chalkboard fabric to the quilted backing to secure the layers, and added the binding around the edges.  Super fast and easy!  Now they can draw while they're waiting for their dinner.  They can even roll them up and take them to a restaurant to help keep them occupied during the sometimes long wait for their food.

There weren't very many charm squares in the packs I used, so I made them all up into four-patches, then used whatever I needed for each large placemat.  I had two blocks left from Grayson's, so I made a double-sided mini potholder for his play kitchen (shown in the top picture).  There were four blocks left from Rory's, so I added some extra strips, and used some scraps of the chalkboard fabric to make a pair of doll-sized placemats for her play kitchen table (about 6" x 8").  Let the tea parties begin!


Cheers!


Wednesday, March 5, 2014

Selvage Project

It's been a productive week here in the Cotton Cellar.  And why not, since it's SO COLD outside, I might as well hibernate and get some work done, right?
I pieced four more "Paint Box" Baby quilt tops, three brights, and one pastel.

Then I had the urge to make something for myself.  I've been collecting selvages for ages, waiting for the inspiration to make something with them.  Well, it finally hit me...  I have a handmade wood extension table for my featherweight machine, that is just awesome...
But I needed a tote bag to keep it in... 
A great use for all those selvages, don't you think?
I used white duck cloth for the foundation, fusible fleece for the batting, then stitched the selvages down using this technique from Elizabeth Hartman.
I didn't use a lining, simply turned the top edge down and top-stitched it in place.  I zigzaged all the raw edges to secure the threads.  Boxed the lower corners just a little, then added webbing handles, and done!  My custom, hand-made extension table now has a safe and sturdy carry case!

Now I need to quilt those four Paint Box quilts...  while it's still too cold to go outdoors...

Cheers!

It Fits!

Kind of a goofy pose, but the dress fits!  And she loves it :)

Sunday, March 2, 2014

Men's Shirt to Toddler Dress

As promised, here is one of the grand-children projects I've been working on lately...  I've seen these dresses all over Pinterest that are made from re-purposed men's shirts.  I've used men's oxford cloth shirts for quilts and love the fabrics, so I just knew this was something I needed to try.

I found several tutorials, including this one, and after researching them all, ended up doing my own thing... as usual.
I already had some old patterns on hand from when my daughter was a toddler, so I combined a peasant shirt pattern with a dress pattern and came up with a pattern for a peasant dress that I thought would work.
I used a pink and white striped Ralph Lauren oxford shirt that I picked up for a few dollars at Goodwill, and cut it so the logo still shows on the dress.  I modified the directions for the elasticized waist shown on this tutorial, using leftover fabric from the pressing table I made a few weeks ago.
Then I finished it off by making a pair of hair bows using this free pattern by Oliver + S.
Now I just have to wait until Miss R tries it on for size, then I'm ready to make some more!  I picked up a nice stash of men's shirts at Goodwill and can't wait to see how they turn out!

Cheers!